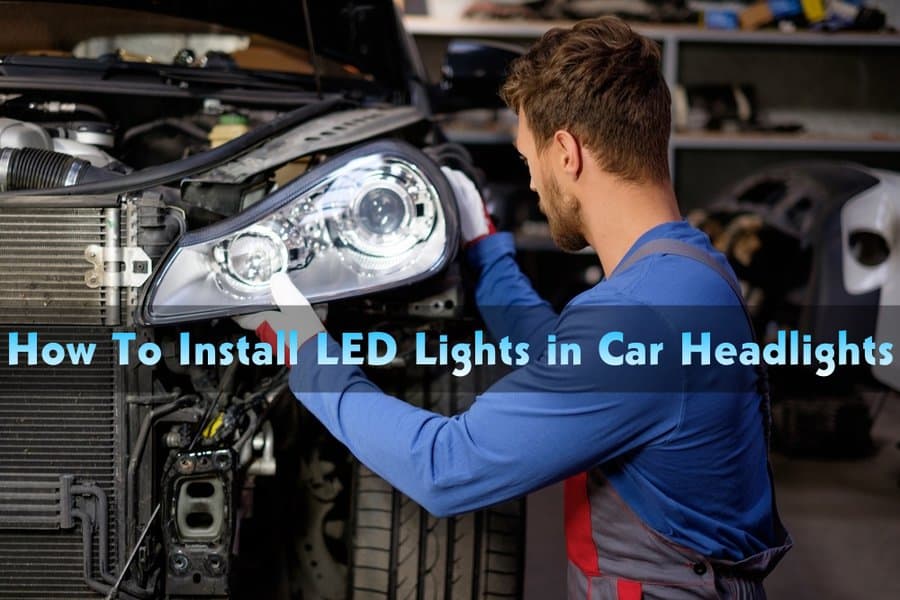
This article highlights how to install LED lights in car headlights, following simple procedures/steps.
The light output or the illumination capability that the vehicle’s headlights deliver must be at a top level at all times to ensure the driver has a clearer view of the objects ahead when driving at night.
We have prepared comprehensive yet easy-to-understand/follow LED headlight installation procedures in our guide.
In the end, every independent installer or vehicle owner will have direct/specific knowledge of what to do when their headlight bulbs fade out.
Can I Install LED Lights in My Headlights?
Yes, you can.
Replacing the old/damaged headlight bulbs with LED can be done by anyone, provided they have access to the appropriate set of instructions and tools.
LED bulbs have become a popular replacement/installation choice among vehicle owners who are seeking better performance from their headlights
LED lamps are popular for their outstanding performance, most notably the longer hours of operation they offer and the higher/improved lighting efficiency.
At first, the cost of acquiring or purchasing LED bulbs for your headlights could look like a big investment compared to other lighting options.
When the long-term cost implication is considered, especially the longer lifespan and brighter light they offer. LED headlight bulbs become an ideal pick for the money.
Requirements For LED Headlight Installation
Tools
The following are basic tools that are instrumental to completing the process.
- Flathead/Phillips screwdriver
- Electrical tapes
- Ballast
- LED light bulbs
- Needle-nose pliers
- A wipe or tissue
- Wrench/socket
- Safety glasses
- Gloves
Time
The process is straightforward, with the appropriate tools and instructions to follow. However, the installer should not treat this job with levity/carefreeness.
On average, the replacement process takes about two (2) hours to have the bulbs in the casings replaced.
Cost
When it comes to all the classes, types, or categories of headlight bulbs, LED is the most expensive. On average, a quality LED bulb will cost between $50 and $200.
Any individual who decides to settle for a professional installation can budget between $100 and $200 for the two headlights.
The installation expense may go average above $200, depending on the vehicle in question and the province/region you live.
6 Steps To Install LED Headlights in Car
01. Settle For The Most Ideal or Best Condition & Time
The LED headlight installation or replacement should be done or carried out in an open space. Especially when there is sufficient natural light.
Aside from eliminating the need for a touch light during installation, it allows clear visibility to ensure the installer can get things done without any errors.
Ensure the vehicle is parked in a leveled ground/area to promote safety throughout the process.
Finally, the engine should be off. Not only that, the key must be taken out or removed from the ignition. Also, do not forget to activate/engage the parking brakes.
02. Choose The Right LED Bulb
Before settling for a specific/particular LED headlight bulb for the replacement. Ensure its compatibility with the vehicle you drive is verified or ascertained.
When it comes to replacing or integrating components/accessories on the vehicle, assumptions should not be entertained.
Go for a bulb that can easily slot into the headlight sockets. This involved picking the ideal bulb type and size for the vehicle.
The owner’s handbook has the information on the fitment or type of bulb that can be installed into the headlight.
Also, find out if your vehicle’s headlight is a single-beam design or double-beam. This gives precise details about the number of bulbs needed.
03. Take Out The Old/Damaged Bulb
A replacement can’t be conducted without detaching the old bulb.
The removal process can be found in the owner’s manual, and the steps involved are straightforward.
If the owner’s manual is out of reach or has been long lost, simply open the hood and locate the connection.
For individuals who make use of dust cover to protect/shield the headlight compartment away from elements such as dust, road salt, and water.
You will have to detach it from its position to easily remove the old bulb from the power socket. Twist/rotate the bulb in an anticlockwise direction for easy and safe removal.
04. Get The LED Bulb Inserted
Once the old/damaged bulb has been ejected or taken out of the headlight housing, the next step is to attach the LED bulb accordingly.
If the bulb design comes with an adapter, slot it in a successful place. The role of the adapter is to secure the bulb safely in position.
Attach the bulb and then twist it in a clockwise direction to ensure it holds firmly.
Remember the rubber-made cover that shields the headlight compartment from moisture/dust penetration?
The reintegration might not work due to the LED bulb’s cooling system (fan or heat sink).
Irrespective of the heat control system the LED bulb may come with, ensure they are carefully attached and appropriately placed for satisfactory operation and performance.
While we understand how essential a dust cover could be. Getting an ideal design that can work with the installed LED bulb is a great alternative.
Nevertheless, the installer must come to an agreement with the fact that a lot of time, patience, and commitment are essential to ensure proper fitment.
Most importantly, possible contact between the dust cover and other rubber-made components positioned beneath the hood and the heat sink must be avoided to prevent melting/burning for safe and efficient operation.
05. Powering The Bulbs

The ideal LED bulbs should power with ease using ballast wiring/connectors. The connector is designed with dual ends.
While one end goes to the bulb, the other extends to the factory wiring.
To attain exceptional durability & longevity, ensure the ballast is well secured and kept safe/free from elements or conditions that may cause premature wear or damage.
06. Check/Test
Now that the installation has been completed successfully, what comes next is to check if it works.
Once the performance has been certified satisfying, the next stage wraps up the entire process. Ensure all components are correctly placed or positioned.
Essential Issues To Consider Before Installing LED Headlights
01. Suitable Space in Headlight Housing
If you plan to switch from halogen bulbs to LED, the first thing that should be known is that these two bulbs are designed or built differently.
LED bulbs come with some components/accessories that are vital to the setup. These are heat sinks or cooling fans.
As a result, the required installation space will be bigger.
Before going ahead with upgrading/replacing the halogen headlight bulbs with an LED bulb, check/confirm there is sufficient space to accommodate it.
02. Sufficient Venting For Fan-Type LED
During operation, irrespective of the timeframe (short or extended), the LED bulb circuits will release heat at a fast rate, which requires a system in place to allow adequate discharge.
Since the excessive heat is released through the bulb’s base, ensure adequate venting for best performance.
03. Materials of Nearby Components
As we have mentioned above, the circuit releases a great amount of heat through the bulb’s base, which can affect or damage nearby components, especially the ones made of rubber or plastic.
During installation, ensure the rubber-made components in the headlight compartment or assembly are repositioned away from the direction of the heat sink or vice versa.
Ensure other parts under the hood that may be affected are also prioritized. Nevertheless, the repositioning is subject to space/room availability in the engine bay.
04. The Legality of LED Bulbs (State Law)
Check if the LED bulb design is approved or authorized for use in your state or region before making any investment.
How To Ensure the Correct Position of LED Headlights During Installation
To Attain The Correct Position of LED Headlights
Ensuring the LED bulb (s) is placed rightly or positioned accordingly for best performance. There are some precautions or procedures to consider.
01. While your vehicle is parked outside (up to 9 meters away from the garage). Ensure it faces the garage wall and turn on the headlight.
Step out of the vehicle, and mark the beam’s reflection (high & low) on the garage wall. An electrical tape can be used to achieve this.
We will come back to this later.
02. Once the bulb sits firmly inside the socket, the installer can move a few inches away from the car.
While facing the vehicle, focus on the bulbs to see if they are appropriately placed or positioned.
The two bulbs (for low & high beams) have a particular direction they must face or point at for double beam headlight.
While the high beam LED bulb points to the ground or downward, the low beam bulb must point to the upside direction.
Until the appropriate positioning of these two bulbs is ensured, the optimum light intensity, range, or output won’t be achieved or assured.
03. Once the LED bulbs have been connected to the power source and the whole process has been successfully finalized.
You can now conduct the final test to detect irregularities/deviations in how the headlights aim or focus on objects.
Turn on the headlight and see if each beam (low and high) focuses on the tapes placed on the garage wall (first bullet point).
If the beams aim accordingly, then the orientation/alignment is okay. In case they do not make necessary corrections.
Why is it Necessary To Check The Alignment and orientation of LED Headlights?
The idea of adequate positioning is to ensure light is distributed/dispersed evenly across the road at night.
This way, the driver will attain a precise and timely observation of the things or objects ahead.
Also, a properly aligned or positioned LED bulb prevents the light output/brightness from coming in the way of other drivers (having the light pointing directly into their eyes or blurring their vision/visibility).
Safety is only achieved when you and other drivers can see the road condition clearly and avoid possible obstacles or objects that could result in accidents or disasters.
When the bulbs are aimed inappropriately, this may lead to other drivers calling your attention to the issue continuously.
Are LED Headlights Upgrade Really Worth It?

LED bulbs are designed to produce brighter and more efficient light than other types of headlight bulbs.
Impressively, they deliver these performances without affecting or minimizing the engine performance. Also, LED bulbs consume less power or energy during operation.
Compared to other replacement options (halogen & HID), LED bulbs are built to last for a very long time, extending over 15 years in some cases.
As a result, a replacement may not be required all through the vehicle’s lifetime. If there is a need to get the LED bulb changed, it won’t extend beyond two times.
How To Choose The Correct LED Bulb For Your Car?
a) Single Beam Vs. Double Beam
If a vehicle has a single-beam headlight installed, you will need two LED bulbs for each casing. (One bulb per beam: high and low).
A double-beam headlight uses one bulb per casing.
b) Different Groups
LED bulbs are available in various groups or fitments (H1, H3, H4, H7, H11, HB3, and HB4).
For instance, why do the H3 & H4 bulbs deliver similar light intensity or output, they can’t be interchanged or used in place of one another.
A headlight designed to work with an H3 LED bulb can’t accommodate an H4 bulb.
Ensure you know the ideal fitment before a purchase is made.
c) Headlight Housing (Projector Vs. Reflector)
In basic terms, projector housing is the latest headlight technology adopted by automobile makers.
Reflector housing has been around since the early days of electrically powered headlights.
The projector headlight is engineered to deliver a brighter and more even light output than its counterpart (the reflector headlight).
d) Fan Vs. Heat Sink
Fan and heat sink are integrated systems that facilitate heat control/dissipation. Remarkably, the cooling capacity of both systems is stable.
Compared to the heat sink, an LED with a fan has a simpler design/structure that fits greatly into position without needing a large extra space.
Also, the cooling mechanism is faster.
Tips For Car Headlight Installation
01. Choose from the best brands/designs around. The top-rated options have been tested and trusted for the best quality and performance over the years.
Brands such as Hikari and Morimoto are excellent places to start.
02. Ensure the bulb is carefully and firmly positioned or inserted into the socket.
This eliminates possible pull-out or removal after a few days of use due to vibrations or shakes that may occur during each drive.
03. The ballast connector and the wiring must be secured and protected from elements or conditions that could result in premature damage.
04. Turn off the LED headlights when there is no need for them
05. Do not turn them on/off repeatedly.
06. A dust cover would go a long way in enhancing durability and longevity for individuals who live in extreme regions.
Final Words
Installing LED headlights isn’t complicated or complex. It is a task anyone can comfortably pick up or take part in with the appropriate tips or steps to follow.
The breakdown we have provided in this guide on how to install LED lights in car headlights is adequate enough to give the clarity an independent installer may seek to get the job done.
Most importantly, consider the cost implication and choose a quality kit offered within a reasonable/sustainable budget.

Hello there, this is Thomas Byrd. I am a professional car mechanic who leads a team of junior mechanics in a repair and restoration shop. In the beginning, I used to work for a jeep service center as a basic worker. From there I keep learning, changed my job 2 times and now I am a professional who leads a group of mechanics. Though a have expertise in the jeep, I know very well about all types of cars. To share my knowledge and skills with others I have created this blog website. Whenever I get free time from work I give my time to my blog.
